With the stable release of Flutter 1.12, Flutter for web is now in the beta channel. But ahead of a beta release, the community has already started building apps for Flutter web.
While building web apps, deploying them is one of the most essential tasks — be it is for internal QA purposes, for staging, or production environments. Before releasing the Flutter web app, it is required to create a release bundle and a few of the best practices to release, which are explained here in detail.
From my experience of building and deploying Flutter web apps, I’m going to discuss the top 5 ways (step-by-step) to deploy Flutter web apps. They are:
- Firebase Hosting
- Github Pages
- Netlify
- Codemagic Static Pages
- AWS S3 (through codemagic)
#1: Deploy Flutter web app to Firebase Hosting
The first way to deploy Flutter web apps is to host your Flutter web app on Firebase and here are the steps to do so-
Step 1: Create a project on Firebase console
Step 2: Download Firebase CLI
Step 3: Login via CLI, execute the command firebase login

Step 4: Choose Firebase “Hosting” for Flutter web app when asked for a feature
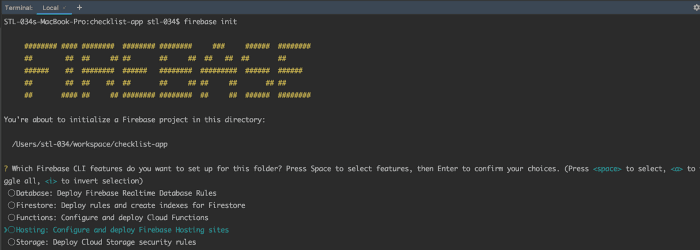
Step 5: Then, Select an existing Project
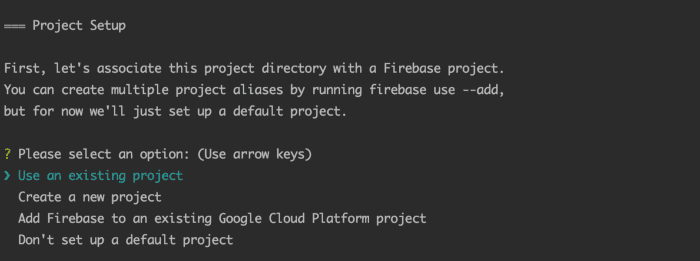
Step 6: Choose build/web as a directory & configure as a single-page app
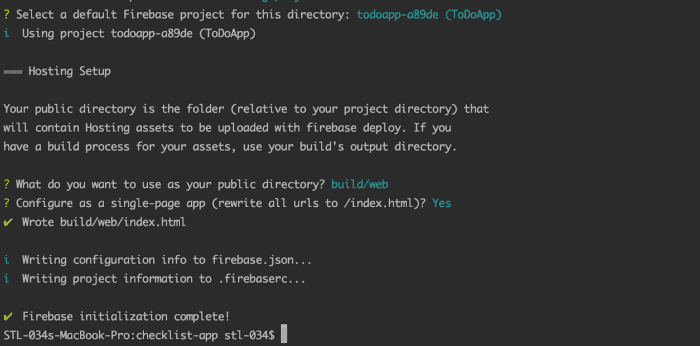
f you see, File build/web/index.html already exists. Overwrite?
Then select NO. So it will not generate a default index.html file
Step 7: Deploy Flutter web to Firebase!
firebase deploy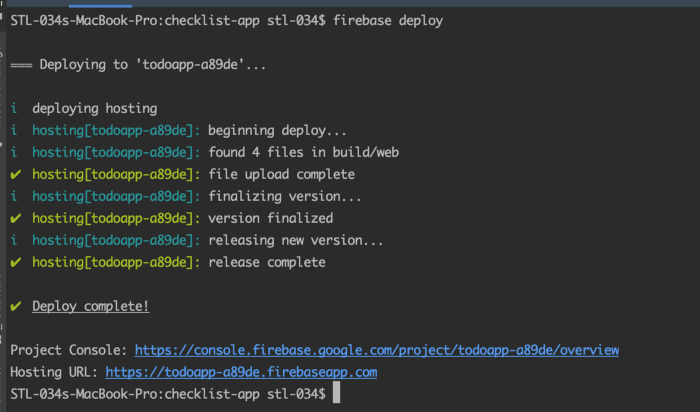
#2: Deploy Flutter web app to Github Pages
Another way to deploy Flutter web apps is using Github Pages and here are its steps-
Pre-requisites: Create a repo on Github.
Step 1: Use this pub
Execute the command
flutter pub global run peanut:peanutStep 2: Flutter web-related files will be generated to the separate branch gh-pages (Don’t forget to push the branch origin)
Step 3: Change the GitHub pages source branch.
Go to: Repository → Settings → Options → Github Pages → Source branch: select gh-pages
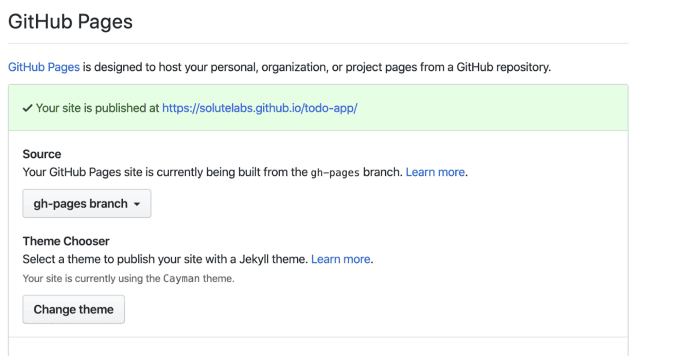
Step 4: Flutter Web app will be deployed to Github
http(s)://<username>.github.io/<build>
#3: Deploy Flutter web app to Netlify
Pre-requisites: Create an account on https://www.netlify.com/
Approach 1:
Step 1: Drag & Drop build/web folder to dashboard
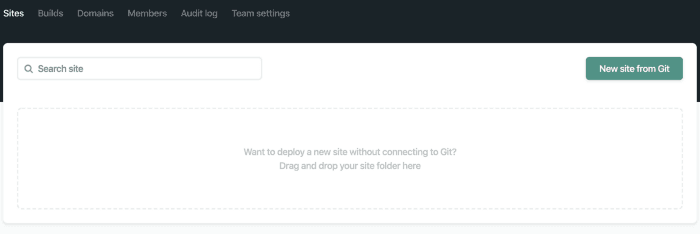
Step 2: The web app will be deployed and the domain will be given to you.
Step 3 (Optional): The web app can be connected with the custom domain/subdomain.
Approach 2:
Step 1: Use the same peanut pub
Step 2: Generate web-related files to the gh-pages branch
Step 3: Choose New site from git on the netlify dashboard
Step 4: Choose the repository & select branch to deploy
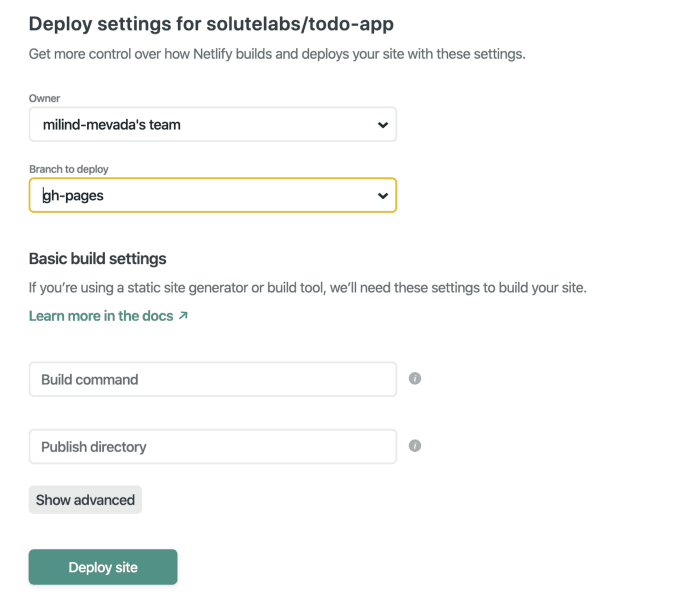
Step 4: Deploy Flutter Site to Netlify.
#4: Deploy Flutter web app to Codemagic Static Pages
Step 1: Connect repository to https://codemagic.io/
Step 2: Go to Settings — Publish — Codemagic static pages
Step 3: Choose your custom subdomain
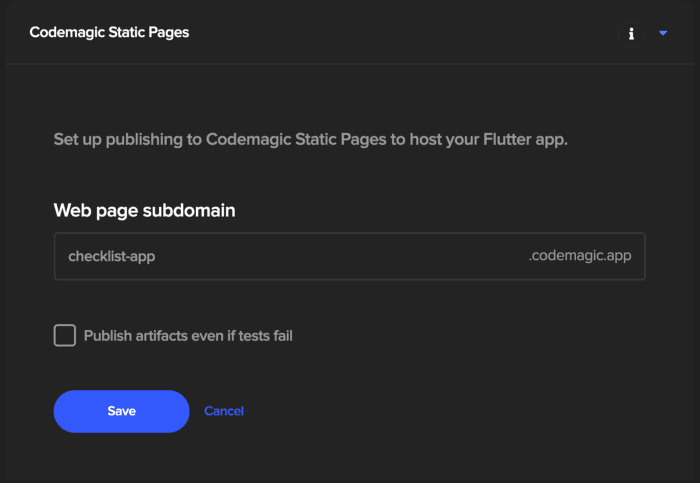
Step 4: Trigger a build, on the success, it will be deployed to:
https://sub-domain.codemagic.app/
#5: Deploy Flutter web app on AWS S3 (via Codemagic)
Step 1: Log in to your AWS Management Console.
Step 2: Click on your user name at the top right of the page.
Step 3: Click on the Security Credentials link from the drop-down menu.
Step 4: Find the Access Credentials section, and copy the latest Access Key ID.
Step 5: Click on the Show link in the same row, and copy the Secret Access Key.
Step 6: Choose repo on codemagic
Step 7: Go to Settings — Publish — AWS S3 Bucket
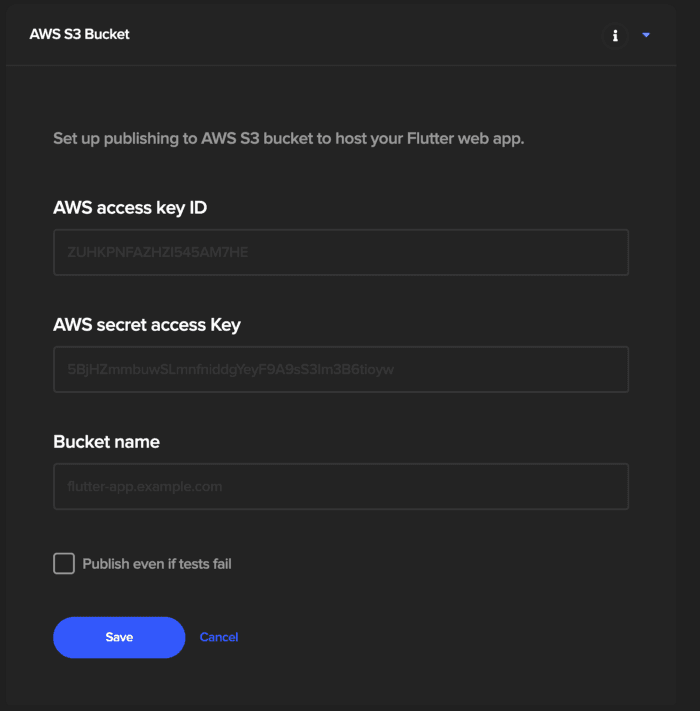
Step 8: Fill the Access key ID, secret access Key, and Bucket name
Step 9: Trigger a build, on the success, it will be deployed to an S3 bucket
We have enough approaches to deploy/release a Flutter web app, that can be chosen for the QA environment as well as the production releases. Connecting it with CI/CD like Codemagic will reduce the repeating effort of manual deployments.


