Since it’s much-awaited launch, Flutter has caught a lot of attention, and we’re excited about it too! I’m hoping that a massive chunk of non-game apps will transition to flutter, and in anticipation, we are therefore training our team on it as well.
Since there are new, but few, resources scattered over the internet to learn flutter basics step by step — we’ve compiled our Flutter tutorial to get developers off their feet and start developing apps for Flutter.
In this Flutter step by step guide for beginners, we will cover:
- Flutter: What, How, and Why?
- Setting up Flutter
- Dart Basics
- Flutter Basics
- Widgets
- Layouts
- Interactive Widgets
- Designing an app: Forms, Gestures, and Images
- Lists
- Navigation
- Networking
- JSON and Serialization
- Dependency Management
- State Management
- Testing (Unit and Integration)
1. Flutter: What, How, and Why?
What is Flutter, and how is it different? Being Flutter app developers, you need to just remember this — Flutter was built to work for any device with a screen and works with:
- iOS and Android
- Web and Desktop (Mac, Windows, and Ubuntu) — Even support PWA
- Auto
- Raspberry Pi (POC stage)
Check out this video from Google; it’s a great place to get a grasp — comparing Native Development, Hybrid App Development, React Native Development, and finally, Flutter App Development.
Here is the latest news on the launch of the new version of Flutter and Dart programming language-
2. Setting up Flutter
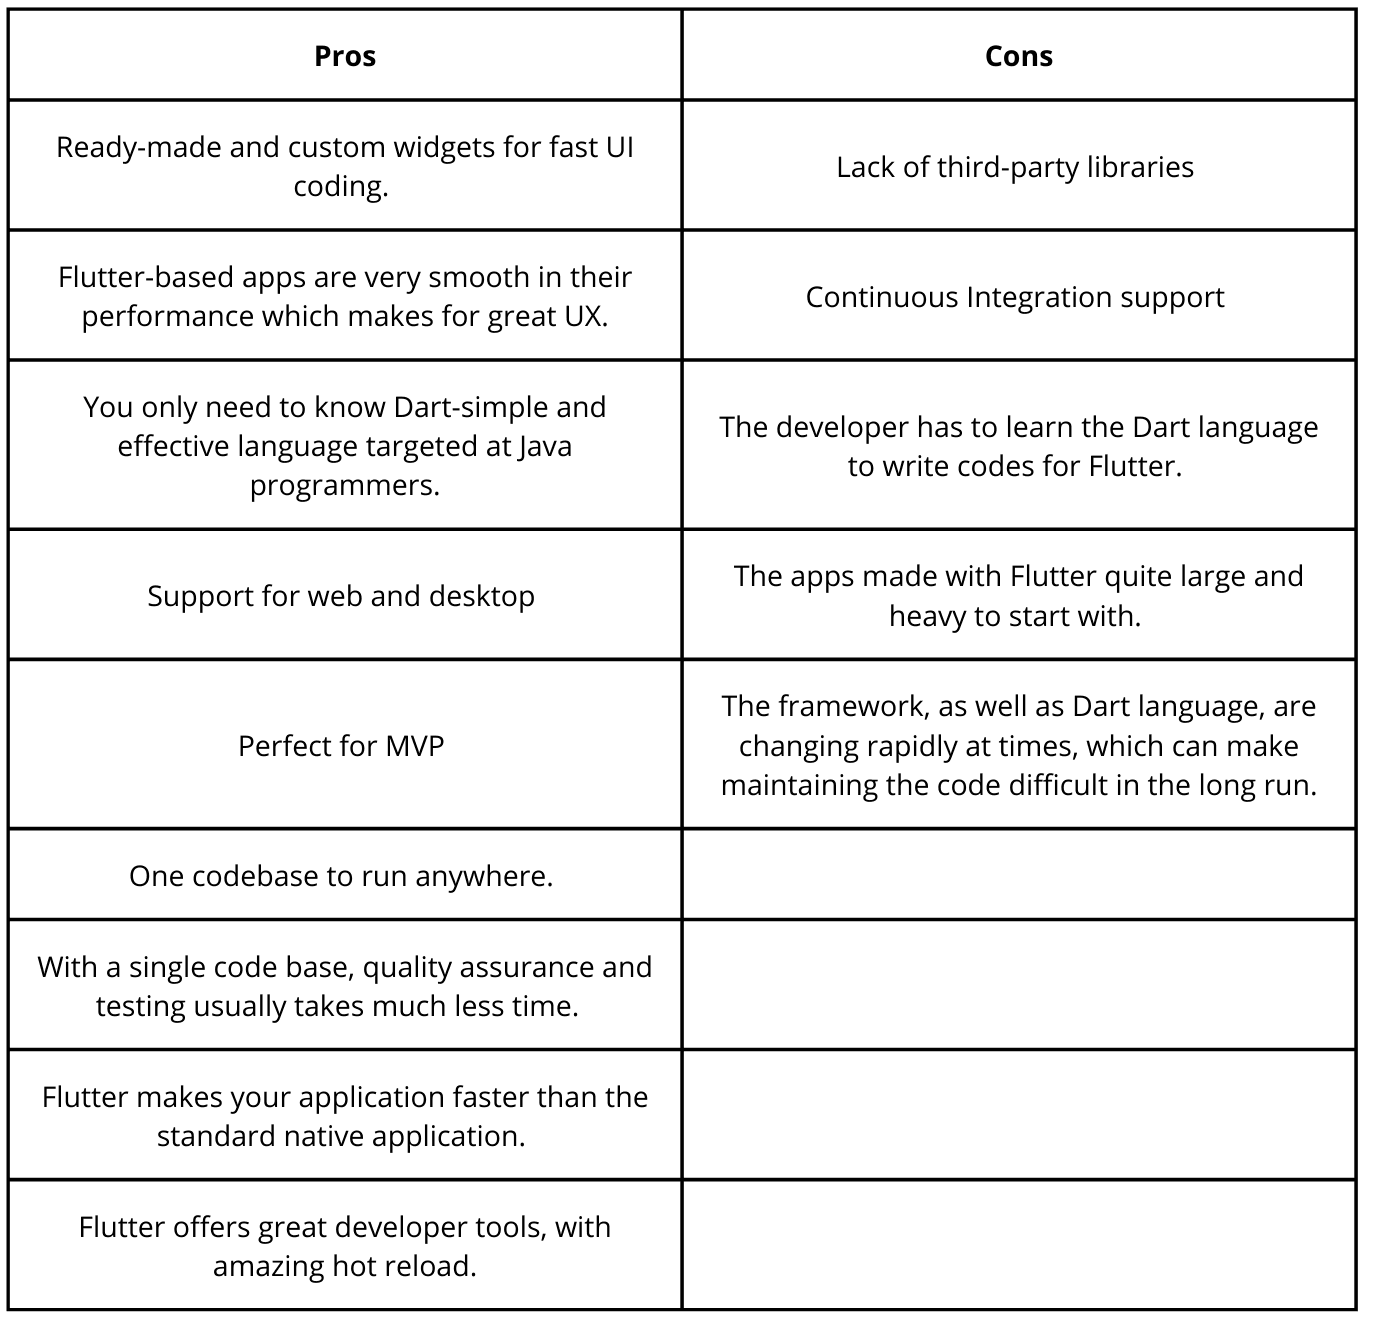
Flutter is relatively straightforward to set up and depending on what OS you’re using; you can check out the steps in this official Flutter tutorial: https://docs.flutter.dev/get-started/install
But in case, you do run into something, check out here: https://github.com/flutter/flutter/wiki/Workarounds-for-common-issues#flutter-installation
The reason we ask that you setup Flutter before Dart is because when you install Flutter, you install Dart too, and while you can separately install Dart, it would be an unnecessary step. Flutter will decide which Dart version will be used, so installing different Dart version will be ambiguous as well.
Once you’ve downloaded and unzipped Flutter, you should see something like this on running the Flutter command at the console:
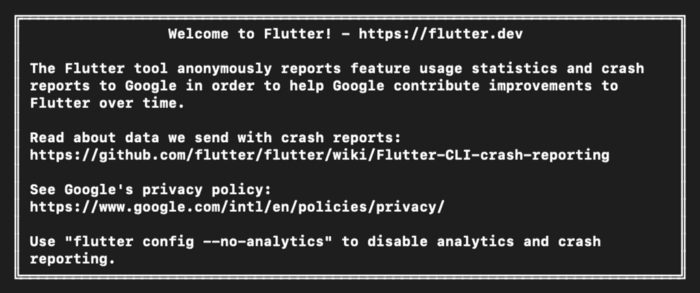
If you’re new to mobile development in general, you will need to download Xcode and Android Studio (and toolchain), as well. Once you’ve setup Flutter, scaffolding a new project is just one command.
3. Dart Basics
Flutter uses Dart language to build Apps. To understand why Flutter uses dart, check out my previous blog and down to the section — How Flutter was born
Flutter and Chrome use the same rendering engine — SKIA. Instead of interacting with native APIs, it controls every pixel on the screen, which gives it the much necessary freedom from the legacy baggage as well as the performance it has.
Do give the official doc a read, but I found this one to be good at explaining dart
P.S. You can follow up with Dart updates on their medium account
Now, you know why Google choose Dart — so let’s get your hands dirty!
Learn Dart
Check out the official docs of Dart language, a tour, and their language samples.
Once you have an overview from this Dart tutorial, head over to https://www.jpryan.me/dartbyexample/ and do all the examples religiously.
Practice, Practice, Practice!
Edit your code on DartPad for starters and get a better grip. I’m sure you’ll be up and running in no time!

After, you’re done with dartbyexample, head over to exercism, and complete their dart track. It’s trendy, so in case it’s full, you can do the practice track too.
4. Flutter Basics
Now that you’re familiar with Dart, it’s finally time to move on to Flutter basics

Let’s start this Flutter tutorial with the technical overview here:
And scaffold a new Flutter app with:
flutter create app_name
And you should see something like this:
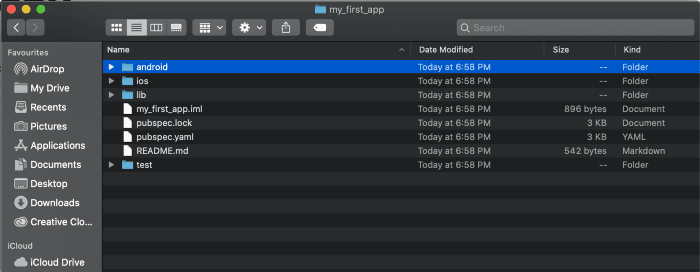
Open the project on the Android Studio, download the emulator, and an Android version if not done already and run the project — and et voila!
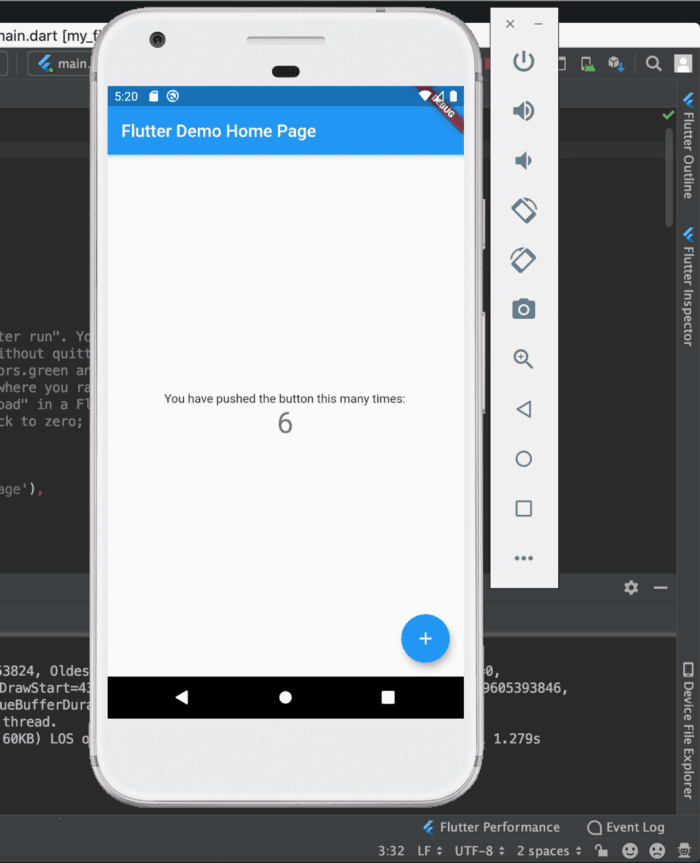
Understand as to how should you structure your project directory and understand which files are meant for which purpose
Now that you’ve setup flutter, another step in this Flutter Tutorial for beginners is to do what all developers do! Use other’s code 😆 — what I meant is to set up the package file: pubspec, written in YAML
5. Widgets
Remember — Everything’s a widget in Flutter
If you’ve not read the technical overview as we asked you before, go back and read it :) Also, we've written a detailed guide on Flutter Widgets from which you will get a fair idea of what widgets are and how you can use it. Widgets come in two flavors: stateless and stateful
Stateless Widgets are those whose state doesn’t change like a button or an image. As the name states, it doesn’t change its state when an action is performed on the screen.
Check out the short video series, and it’s documentation by Google to explore in-depth (I’m attaching the first video in the series).
When a widget needs to hold some state like a current page in PageView, the currently selected tab in a BottomNavigationBar, Stateful widgets are the right choice to make.
StatefulWidgets can hold the current state of a Widget. Instead of a widget build method, a Stateful widget has a State build method which calls each time we explicitly call setState.
And Similarly, check out the documentation (it has the video inside) for the stateful widgets here:
Flutter 1.9 was released at GDD China with a host of new features and a mark that the community is multiplying (and that you can’t ignore China now)
6. Layouts in Flutter
As we discussed earlier in this Flutter guide, everything is a widget in Flutter — including layout models.
Check out the documentation here:
Widgets such as the rows, columns, and grid are layout widgets (which we don’t see on screen) that helps other visible widgets to arrange, constraints, and align.
⏰ Time for Codelab: Write your First Flutter App : Part-1
And, Some more Widgets!
Flutter comes with a suite of powerful basic Widgets such as Text, Column, Row, Stack, and Container. The basic widgets will help you creating custom views as you want.
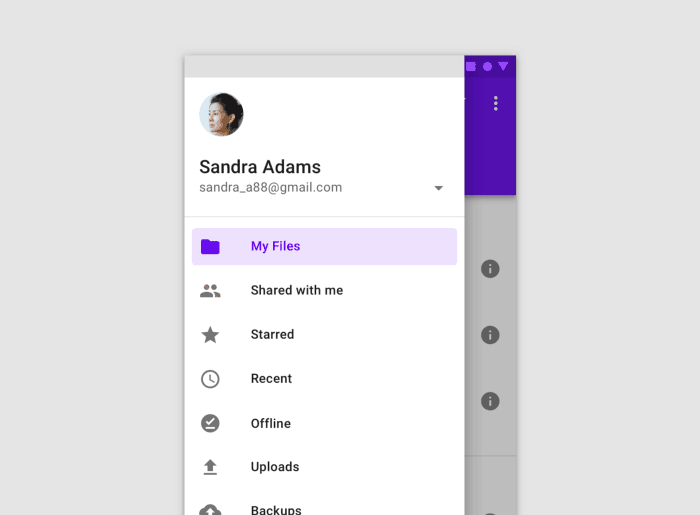
If your app follows material design guidelines, Flutter has a lot to cover by default. Flutter provides several widgets that support Material Design. It includes widgets such as MaterialApp, AppBar, Scaffold, etc.
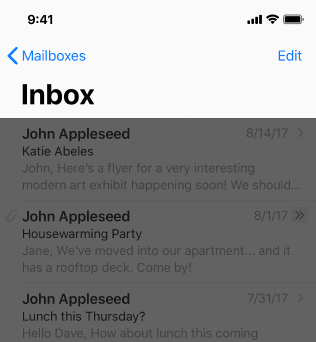
Flutter also includes the iOS-centric Cupertino component package. It covers widgets such as CupertinoApp, CupertinoNavigationBar, etc.
7. Interactive Widgets
So far in this Flutter step by step tutorial, we have seen Widgets that display information on-screen or arrange other widgets. For the real app, it is equally essential to make the app interactive and get user’s input in various forms like Gesture, taps, etc.
To achieve this, Flutter has numbers of StatefullWidgets such as Checkbox, Radio, Slider, InkWell, Form, and TextField, etc. These widgets are capable enough to maintain their state (e.g., Text we are entering in TextField, whether a CheckList is checked or not.)
Go and check out the below example to add Favorites/Non-Favorites functionality to your app.
⏰ Time for Codelab: Write your First Flutter App : Part-2
As you have reached here, you should be clear with What is Widgets ? and Types of Widget
Now you must be curious about what are all widgets available in Flutter?
So here is a Widget Catalog, Check all the Widgets that make Flutter development relaxed and Fun 😍
Flutter Cookbook
And here we go, it’s time to learn Flutter for real apps with the help of Flutter Cookbook. I mean Apps that have Multiple screens, Images, Network dependency, and all.
So, let’s begin.
8. Designing an App
Check the below app illustration.
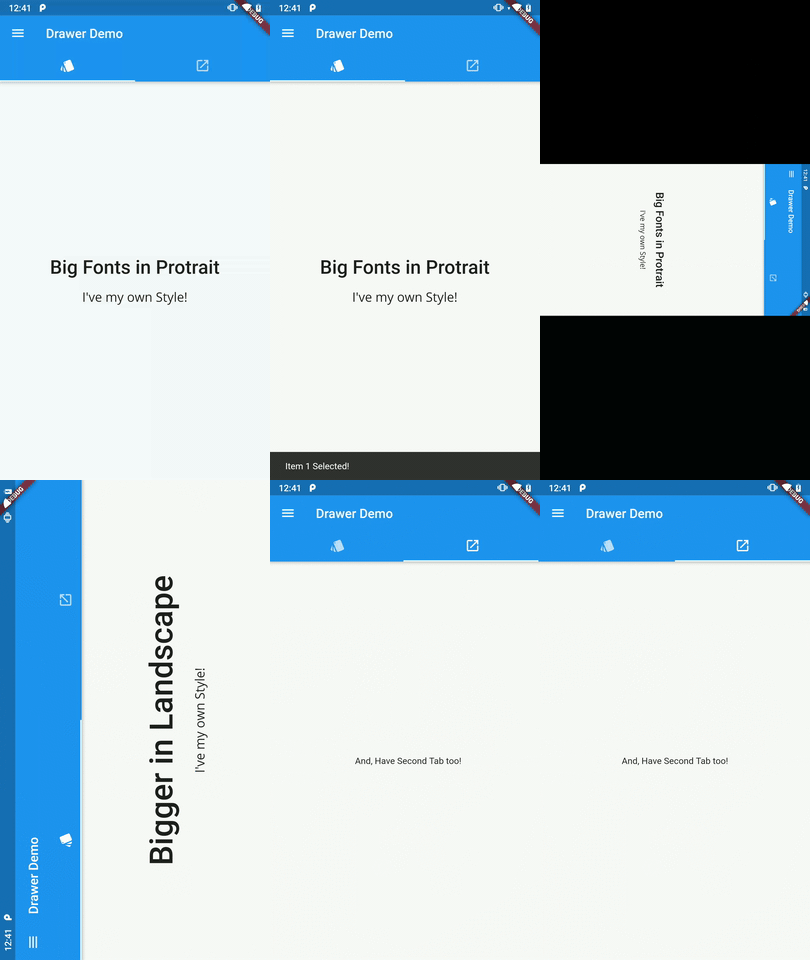
This Simple looking app has these features 👇
- Navigation Drawer
- SnackBar
- Custom Fonts (A Text have its own Style 😉)
- A Text-based on Orientation (Bigger fonts in Landscape)
- And, Multiple Tabs
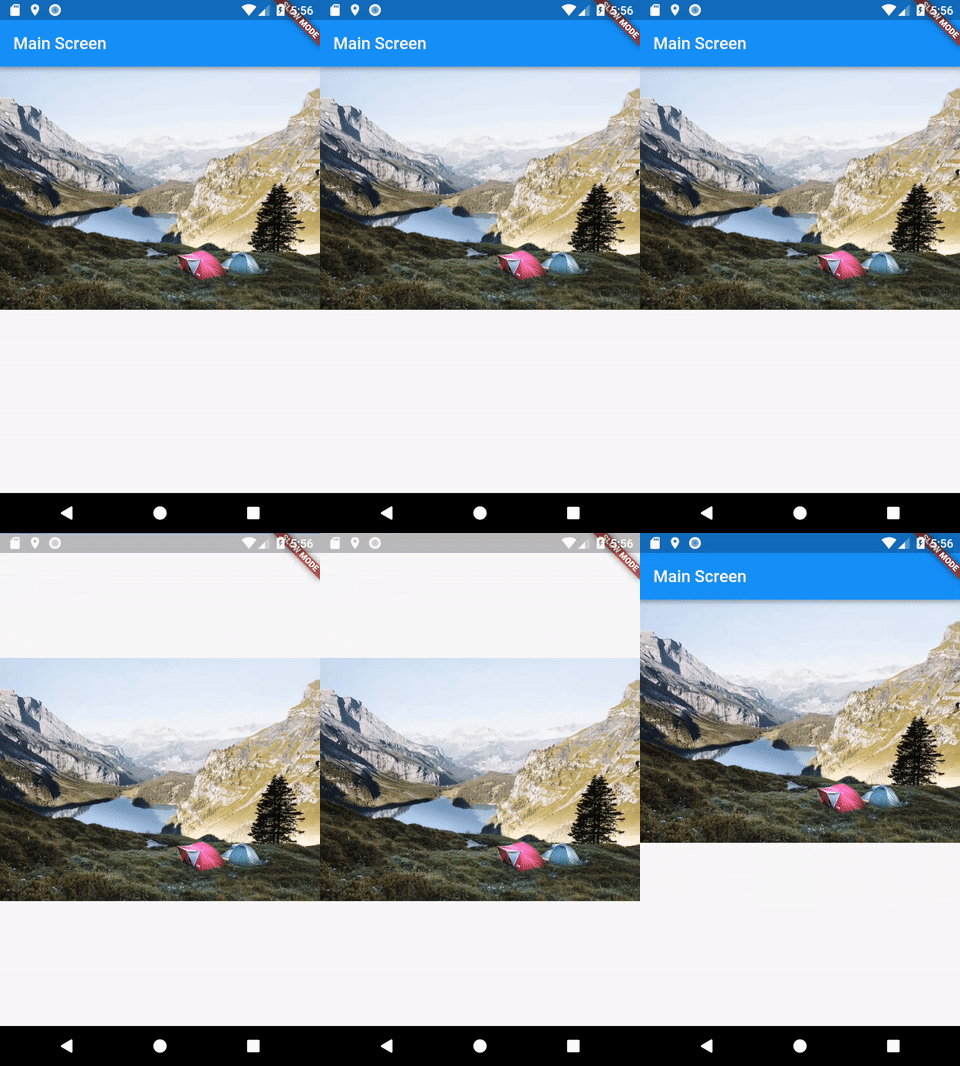
Note here: OrientationBuilder is independent of the device’s orientation. Instead, It calculates the current Orientation by comparing the width and height available to the parent widget. To determine the device’s orientation you can refer MediaQuery.of(context).orientation
8.1 Forms
Flutter has a Form widget that helps to build a form that efficiently manages the essential requirement of a Form, e.g., State of a Form, Validation, etc. Check out the complete guild in the below documentation.
8.2 Gestures
To get the user inputs and some-time to make the app super interactive, we maximize the use of Gestures. Flutter has pre-built widgets to cover this.
8.3 Images
To make apps beautiful and engaging, we use Images. Flutter provides an Image widget to display an image in the Flutter app from various sources.
- Display Images from Network
2. Display Image with Placeholder & with Fade-in Animation
3. Sometimes it’s handy to Load image from network and cache it in local storage to make it quickly available next time.
9. Showing more data using List
To accommodate more data, we use List to show them. The list can be horizontally or linearly.
Flutter has a GridView and ListView. These are basic widgets with different contractors to identify how they can be used.
1. Create a grid list
2. Create list horizontally
3. The list can have different types of Item. E.g., a header & items to it. Check here how you can cover such cases in ListView.
4. Floating app bar and Nested scrolling using SliverList
Don’t forget to check out this awesome article by Emily Fortuna to understand Slivers in depth
5. Sometimes we have predefined arbitrary items to be placed in a List. e.g., Setting categories. In ListView, you can pass custom items (in the form of Widgets) to its children.
6. Sometimes a List has more items then the viewport of a screen. In such cases, it makes no sense to build all the items at once. Flutter has ListView.Builder that uses the Lazy rendering approach to create list items efficiently.
If you have more items in a list and looking to paginate them. Here is a good article I found 👇
10. Navigating between screens aka routes
Most apps contain multiple screens to display data in a well-organized manner.
In Flutter, we can do navigation-related operations using Navigator.
Check below diagram to understand how Flutter manages multiple routes, and later, we will discuss how to navigate up and forth between them.
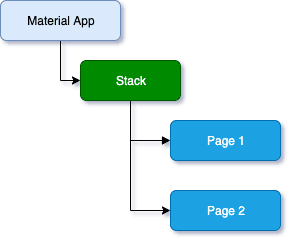
1. Navigate to a new screen and back
2. Pass data to new screens and retrieve results.
So far, what we have seen is Flutter suitable for small projects. But when the project grows, we want to manage all routes at a single place. Also, we might need to address below questions
1. How many routes we have?
2. How to initialize each route?
3. What data is required by each route?
etc..
3. To manage all this efficiently, Flutter has named routes.
4. Pass arguments in named routes.
And, What about this animation while navigating to a new screen?
11. Networking
Most apps we come across nowadays, are generally connected with third party server and makes requests to the server to fetch or post data.
In Flutter, we can use HTTP as a third-party pub to do such stuff.
1. Fetch data from the network
2. Make authenticated requests
3. Work with web sockets
Flutter has few more pubs available, which do such stuff more efficiently. Don’t forget to take a look at the below pubs.
12. Using JSON and Serialization
In Flutter, we generally have two strategies for JSON serialization. Manual parsing and automated serialization using code generation.
Runtime reflection is disabled in Flutter, resulting we cannot have libraries like GSON , Jackson or Moshi
Check out the full guide with both strategies here
For manual parsing, don’t forget to check out this online tool to auto-generate boilerplate for the model class.
Data Persistence
Sometimes we need to persist data in local memory to quickly available whenever we need them.
1. If you have a relatively small amount of data to be stored in a key-value pair. Consider using shared-preferences. Below is the detailed guide to achieving the same using Flutter.
2. You can also read and write files on disk.
3. If an app needs to persist a large amount of data and also it requires to query them. It is advised to use an SQLite database
Flutter app can use the SQLite database via sqflite pub.
For easy to use, reactive persistence, check out below pub. Moor is a wrapper around sqflite.
13. Dependency Management
We use so many pubs in the Flutter app. It’s a great way to work collectively and share code across apps without having to develop everything from scratch.
You can find all the useful packages from here.
With multiple pubs, you might faces issues like conflicts in the version resolving. You can find all the best practices here to be followed while using pubs.
And, with all this, you now have completed Flutter cookbook. 👏
14. An Art of State Management
Introduction
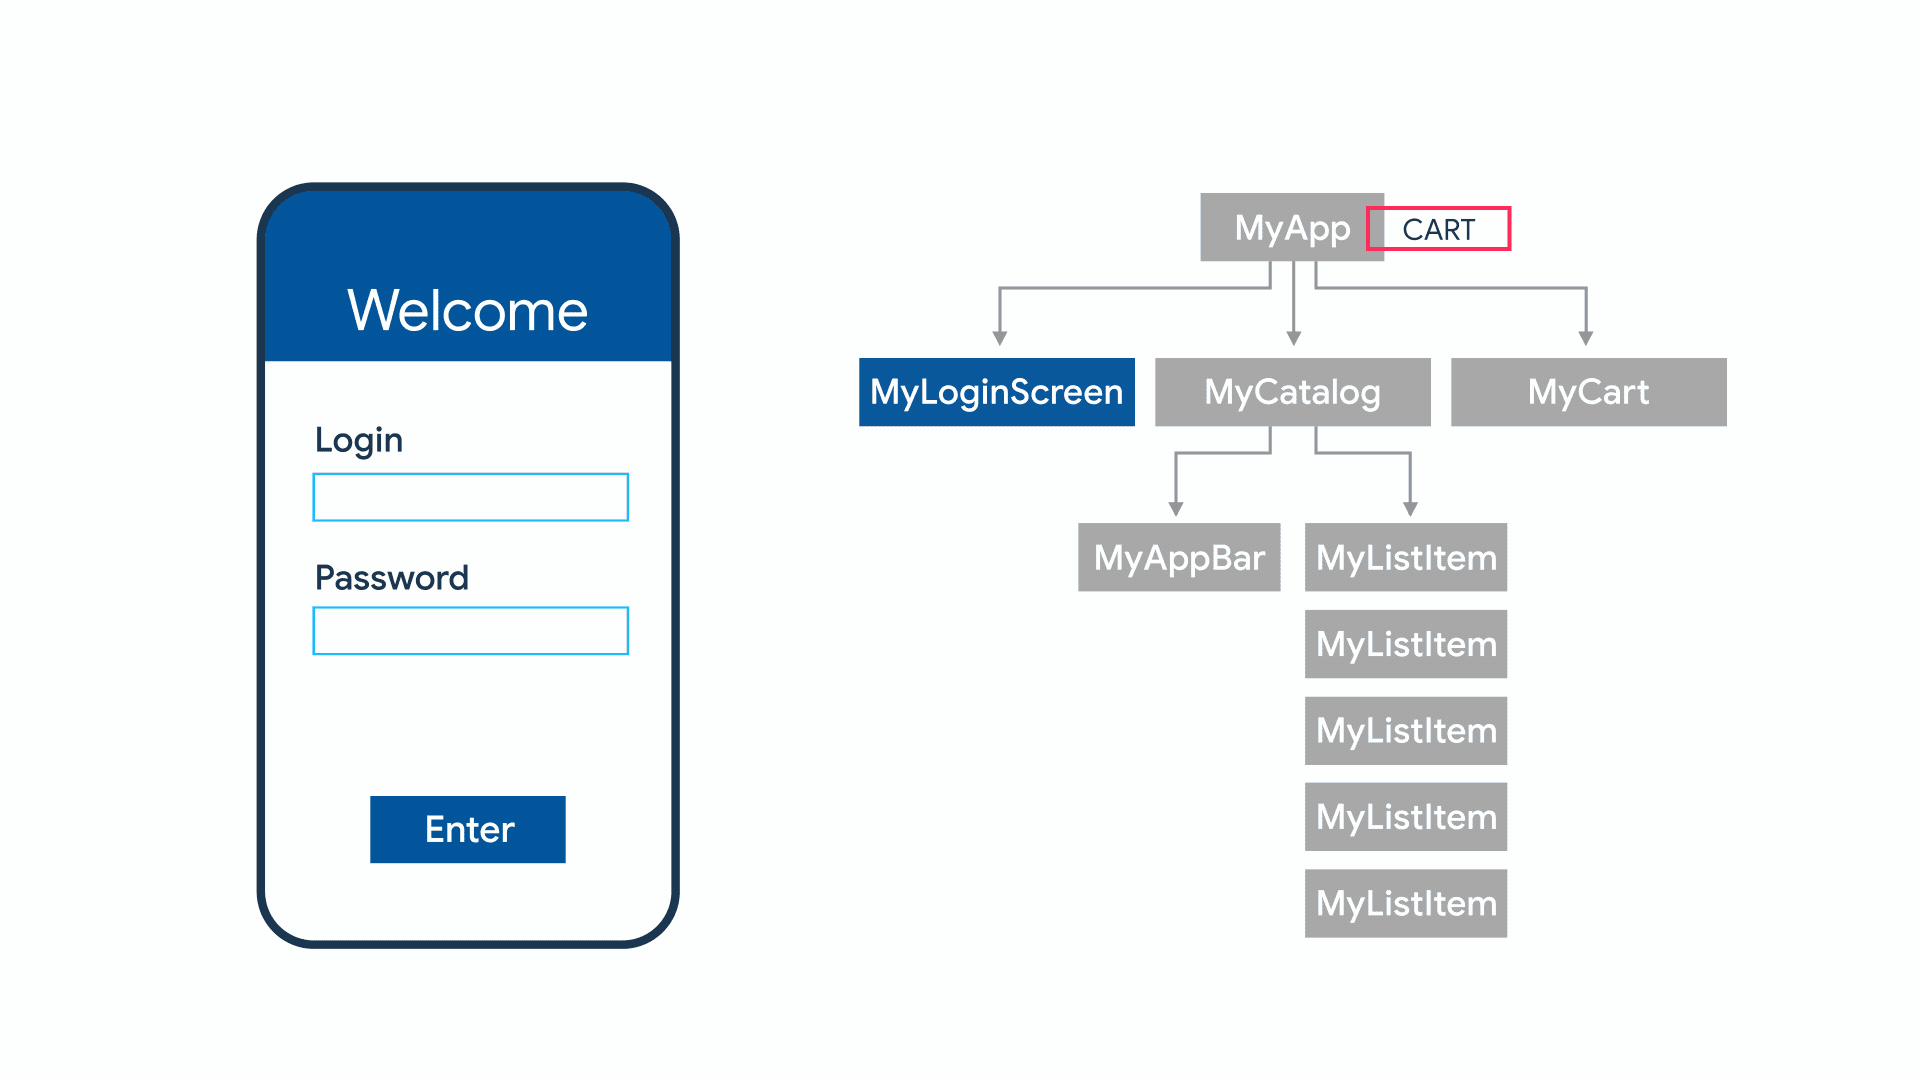
In a typical app, it is a common use-case that a change made at Point-A reflects some changes at Point-B. That is called State Management. It can also be understood by the below illustration.
Flutter has multiple approaches that can efficiently manage the State of the app. Based on project size we can decide the appropriate techniques. We have written an article where you can get to know in detail everything about Flutter State Management.
Here we will discuss a few of the possible techniques for State management.
1. setState way
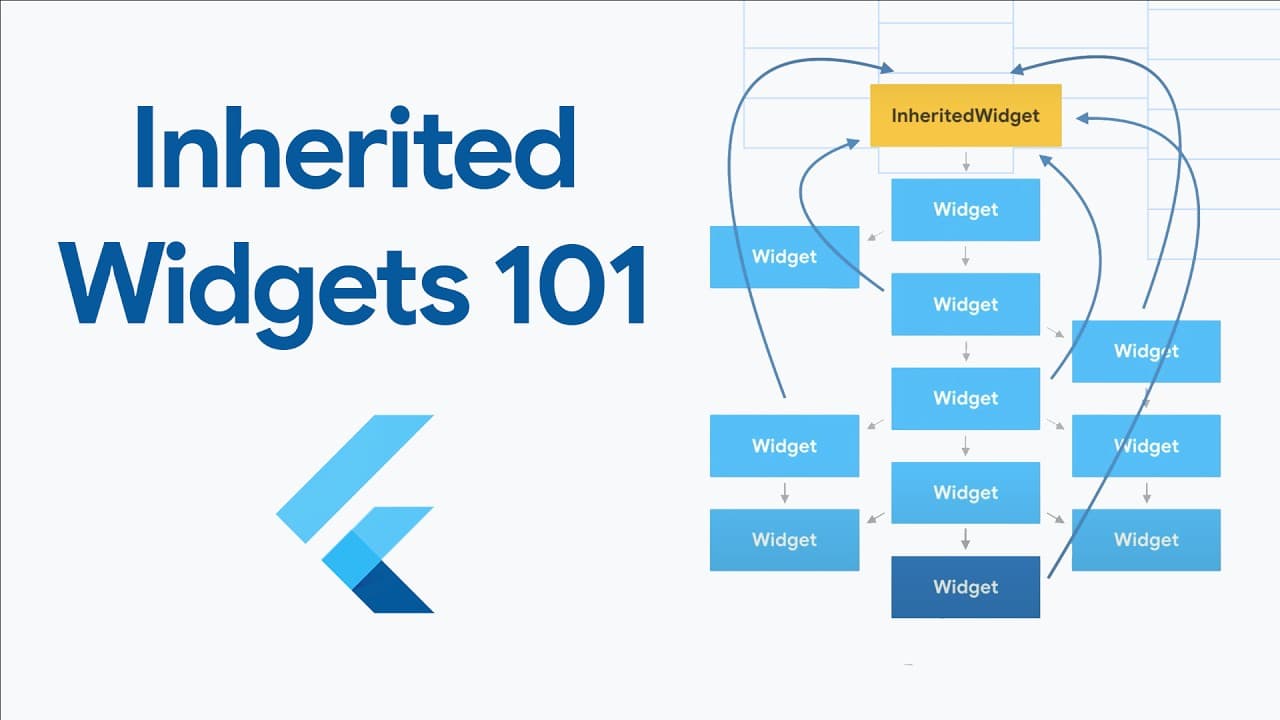
2. Inherited Widget
Check out the below video to understand, What is Inherited Widgets?
Also, Check out the complete list of articles here
Remember “Theme.of(context);” and “Navigator.of(context);” you used earlier? That is using the same Inherited Widget concept to access data down in the widget tree.
3. The Provider Package
The provider is a mixture of DI (dependency injection) and State management built with widgets for widgets.
Official documentation of provider is too good to understand it in depth.
4. BLoC Pattern
BLoC is a Simple, Lightweight, and highly testable a predictable state management library for Dart.
I also found this good video series explaining BLoC pattern (with Accompanying article series)
15. Testing
That’s another step in this Flutter Tutorial. When the app grows, it becomes hard to test every feature, and then it comes regression too. In such cases, automation testing is the way to go. It helps ensure that the app performs as expected before we release it.
And so we don’t fall in such situations. 😆

Automation testing falls under three categories
- A unit test tests a single function, method, or class.
- A widget test (in other UI frameworks referred to as component test) tests a single widget.
- An integration test tests a complete app or a large part of an app.
Check out the introduction to testing in Flutter here
15.1 Unit Testing
The goal of Unit testing is to test a particular Unit of code with Stub/mock dependencies. Verify the code works as expected in different scenarios. A unit test is very fast and doesn’t require an actual device to execute.
While doing Unit tests, any dependent classes should be injectable, so that we can inject a mock or fake implementation of dependency and verify if everything working as expected. Flutter has a mockito framework that helps to create a mock or fake implementation.
15.2 Widget Testing
Widget Testing (in Flutter) is a UI testing technique.
The goal of widget testing is to test if particular Widget UI looks as expected, and it’s interactive. Widget testing doesn’t require a physical device.
We could also test the properties of Widget, like Color, Size, Font Family, etc..
We can also perform user events like tap, gestures, entering text, etc
15.3 Integration Testing
Integration test work in a pair. The goal here is to test how multiple units work together. Integration testing happens on a real device or emulators.
We can fire a series of User interaction events and expect UI rendering or unit codes to be executed properly
Again, Check this Video series for detailed implementation of real App with TDD.
15.4 BDD: Behavior-driven development
TDD or Unit Tests helps when a stakeholder has strong technical skills. BDD is all about writing a test case from the end user’s perspective. This is written in a natural English language.
Testcase can be written in the below format:
Given: the initial context at the beginning of the scenario, in one or more clauses;
when: the event that triggers the scenario;
then: the expected outcome, in one or more clauses.
Internally, a behavior test cases can be a Unit test, widget test, or a combination of both.
BDD helps to understand software functionality from an end-user perspective and becomes a sort of functional documentation.
Flutter has a gherkin that helps us writing Behaviour Test cases.
This Flutter guide for beginners covers all the basics that you would need to know to start with flutter and develop your apps! We hope this step by step Flutter tutorial helps you on your journey to Flutter.

